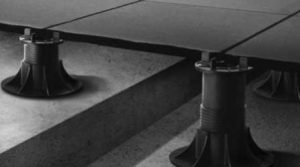
Mainly, there are three raised floor systems that the customers can adopt to install the 2CM Florim porcelain tiles: fixed support, adjustable support, and self-leveling support.

INSTALLATION STEPS
STEP 1
Ensure that the area where the raised system will be installed is flat, compact, rigid, and make sure it can support the weight of the new floor;
STEP 2
Choose the raised floor system that best suits your use. Remember that the raised floor has to be installed to provide adequate drainage of rain water.
*Rectified tiles are required for pedestal installations
Warnings: these systems cannot be used when high dynamic loads transit in the area.
PLUS
- From the aesthetic point of view, it ensures flooring with a single gradient, withot any visible water draining elements
- The small gap between one slab and another allows a quick water drainage, it is easy to clean
- Lower load bearing on attics and balconies as the last layer of concrete and glue is not necessary
- Frost-proof, it absorbs the thermal expansions of the concrete substrate, the direct cause of traditional outdoor flooring subsidences
- The gap between the slab and the concrete substrate fosters excellent thermal insulation
- Best acoustic insulation
- Hidden but easy to inspect pipes
- Speed of installation
- Recyclable
- Value for money solution in terms of laying and maintenance, lasts virtually forever